Cookie Monster Cookies Recipe
Introduction
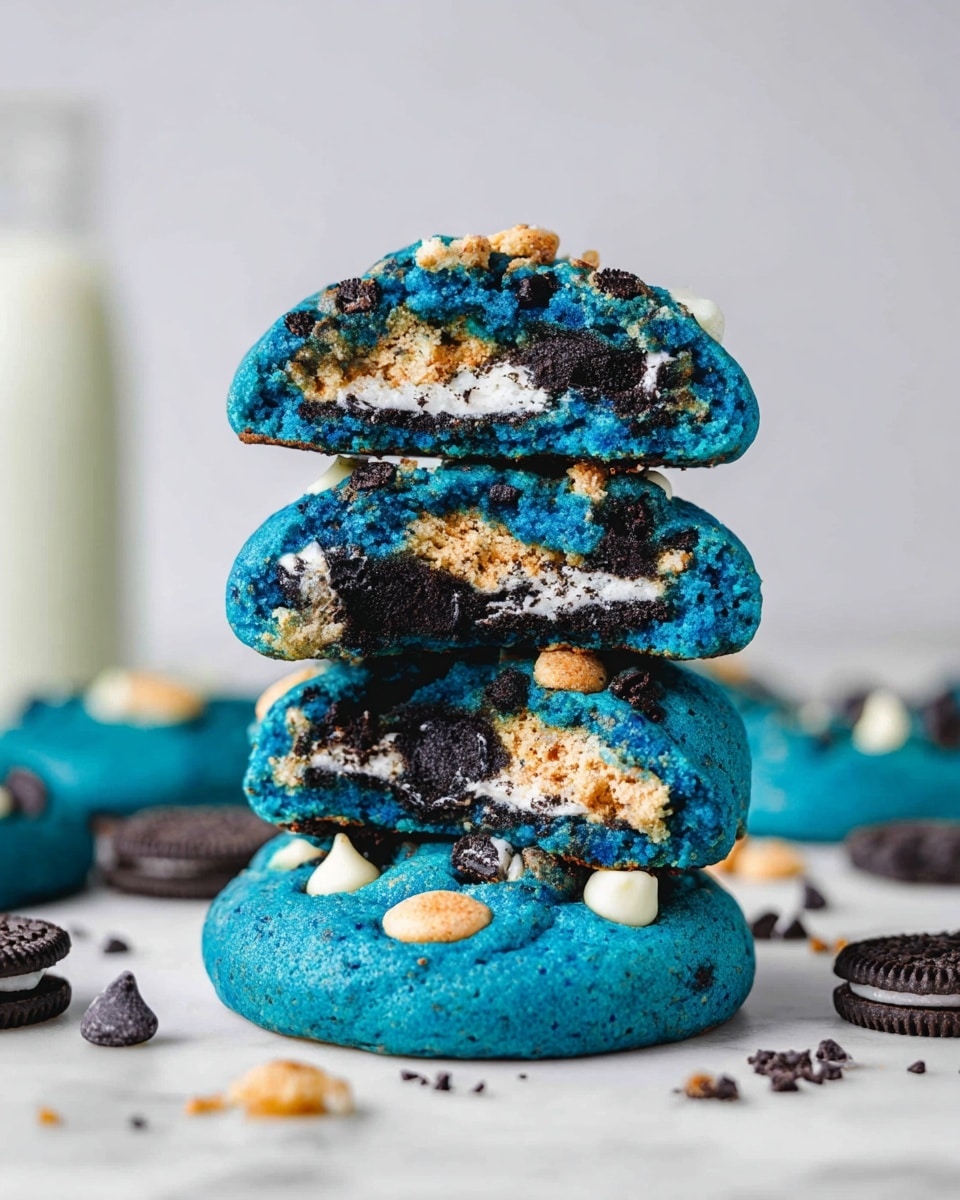
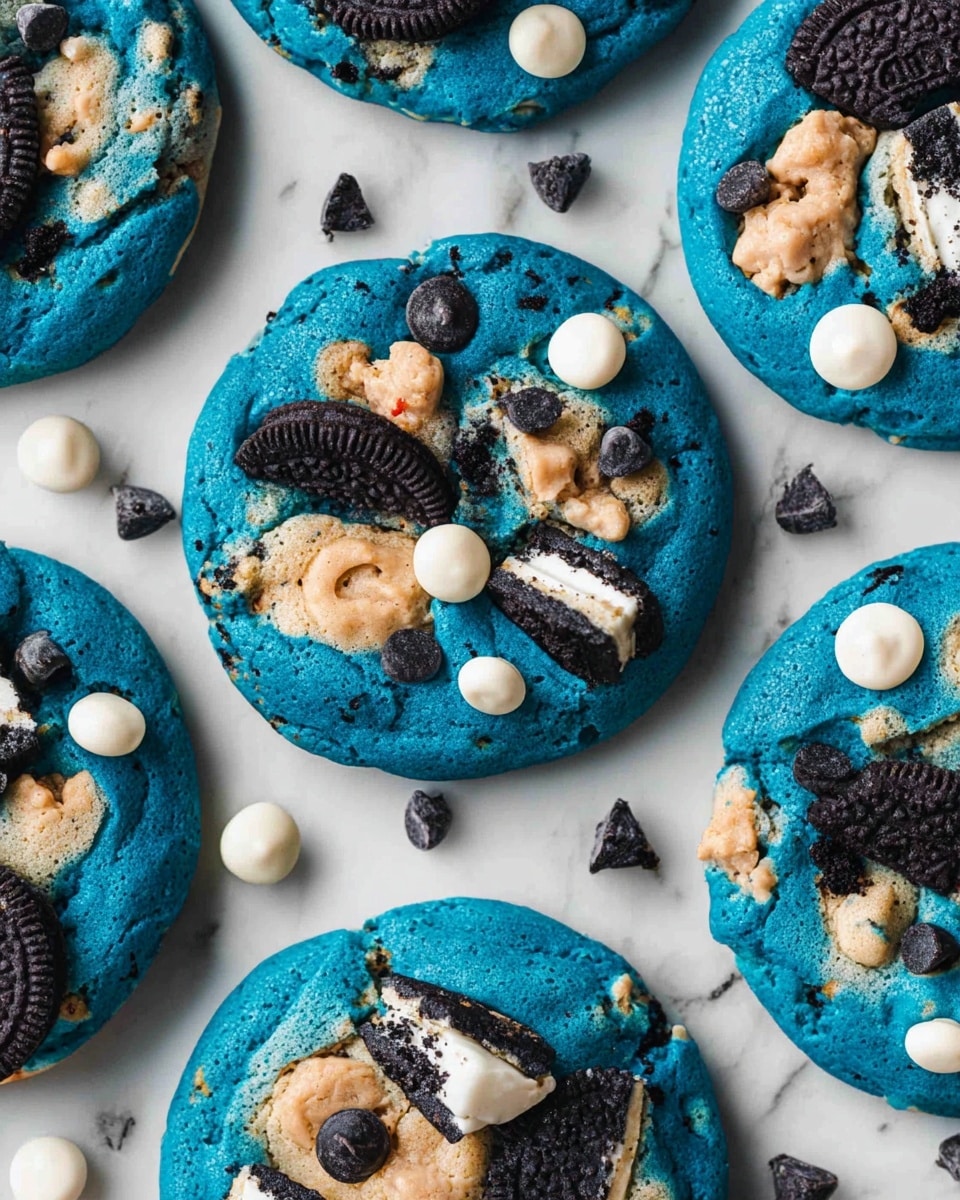
These Cookie Monster Cookies are delightfully soft and packed with chunks of Oreo and chocolate chips, all wrapped in a vibrant blue dough. Perfect for fun gatherings or a playful treat, they combine classic flavors with a whimsical twist.
Ingredients
- 120 g (1/2 cup) unsalted butter, softened
- 100 g (1/2 cup) granulated sugar
- 50 g (1/4 cup) light brown sugar
- 1 egg, at room temperature
- 1 tsp vanilla extract
- Blue gel food coloring
- 230 g (1 3/4 cups) all-purpose flour
- A pinch of salt
- 1 tsp baking powder
- 1/2 tsp baking soda
- 40 g (1/4 cup) dark chocolate chips
- 40 g (1/4 cup) white chocolate chips
- 30 g (1/4 cup) crushed mini cookies
- 3 Oreo cookies, chopped
- 12 Oreo cookies, whole
Instructions
- Step 1: In a large mixing bowl, beat the softened butter, granulated sugar, and brown sugar together for 2 minutes until creamy.
- Step 2: Add the egg, vanilla extract, and blue gel food coloring. Mix with an electric mixer for 1 minute until smooth and evenly colored.
- Step 3: Sift together the all-purpose flour, salt, baking powder, and baking soda. Gently fold these dry ingredients into the wet mixture using a spatula, just until combined.
- Step 4: Fold in the chopped Oreo pieces, crushed mini cookies, white chocolate chips, and dark chocolate chips quickly to distribute throughout the dough.
- Step 5: Cover the dough with plastic wrap and refrigerate for 30 minutes to 1 hour to firm up.
- Step 6: Divide the dough into small portions and flatten each into a disc. Place a whole Oreo cookie in the center and wrap the dough completely around it.
- Step 7: Arrange the wrapped cookies on a parchment-lined baking sheet. Chill again for about 30 minutes in the refrigerator or 15 minutes in the freezer to set.
- Step 8: Preheat the oven to 180°C (350°F). Bake the cookies for 12-15 minutes until the edges are slightly golden but the centers remain soft.
- Step 9: Let the cookies cool briefly on the baking sheet before transferring to a plate or wire rack to cool completely.
Tips & Variations
- For a more intense blue color, add a small amount of gel food coloring gradually until desired shade is reached.
- Try swapping Oreo cookies for other sandwich cookies that you enjoy.
- Use chilled cookie dough to prevent spreading while baking, keeping the cookies thick and soft.
- For extra crunch, sprinkle crushed mini cookies on top of the dough discs before enclosing the whole Oreo.
Storage
Store the cooled cookies in an airtight container at room temperature for up to 4 days. For longer storage, freeze the baked cookies for up to 2 months. To reheat, warm briefly in a low oven or microwave to regain softness.
How to Serve
Serve this delicious recipe with your favorite sides.
FAQs
Can I substitute margarine or oil for butter?
Butter provides flavor and texture unique to these cookies. While margarine can be used in a pinch, oil is not recommended as it may alter the dough’s consistency and richness.
Why is the dough chilled before baking?
Chilling the dough firms it up, making it easier to handle and preventing cookies from spreading too much in the oven. This helps maintain their shape and soft center.
PrintCookie Monster Cookies Recipe

These Cookie Monster Cookies are a delightful twist on classic cookies, featuring a vibrant blue dough packed with chunks of Oreo cookies, dark and white chocolate chips, and mini cookie pieces. Soft in the center and slightly golden at the edges, these fun and indulgent cookies surprise with a whole Oreo hidden inside each one, perfect for cookie lovers seeking a playful treat.
- Prep Time: 20 minutes
- Cook Time: 15 minutes
- Total Time: 1 hour 15 minutes
- Yield: 12 large cookies 1x
- Category: Dessert
- Method: Baking
- Cuisine: American
Ingredients
Wet Ingredients
- 120 g (1/2 cup) unsalted butter, softened
- 1 egg, at room temperature
- 1 tsp vanilla extract
- Blue gel food coloring (as desired)
Dry Ingredients
- 230 g (1 3/4 cups) all-purpose flour
- 1 tsp baking powder
- 1/2 tsp baking soda
- A pinch of salt
Sugars
- 100 g (1/2 cup) granulated white sugar
- 50 g (1/4 cup) light brown sugar
Add-ins
- 40 g (1/4 cup) dark chocolate chips
- 40 g (1/4 cup) white chocolate chips
- 30 g (1/4 cup) crushed mini cookies
- 3 Oreo cookies, chopped
- 12 Oreo cookies, whole (for embedding inside)
Instructions
- Prepare the Butter and Sugars: In a large mixing bowl, beat the softened butter with the white and light brown sugars for 2 minutes until the mixture becomes creamy and light in texture.
- Add Egg, Vanilla, and Coloring: Incorporate the egg, vanilla extract, and blue gel food coloring into the butter-sugar mixture. Use an electric mixer to blend for 1 minute until the batter is smooth with an even blue color.
- Combine Dry Ingredients: In a separate bowl, sift together the flour, salt, baking powder, and baking soda. Gently fold the dry ingredients into the wet mixture using a spatula until just homogenous, being careful not to overmix.
- Mix in the Cookie and Chocolate Chips: Add the chopped Oreos, crushed mini cookies, white and dark chocolate chips to the dough. Mix quickly but thoroughly to distribute the mix-ins evenly throughout the dough.
- Chill the Dough: Cover the bowl with plastic wrap and refrigerate the dough for 30 minutes to 1 hour to firm up, making it easier to shape.
- Shape the Cookies: Take small portions of the chilled dough and flatten them into discs in your palm. Place one whole Oreo cookie in the center of each disc, then carefully fold and enclose the dough completely around the Oreo, forming a ball.
- Rest Before Baking: Arrange the dough balls on a parchment-lined baking sheet. Chill them again in the refrigerator for 30 minutes or in the freezer for 15 minutes to help keep their shape during baking.
- Preheat and Bake: Preheat the oven to 180°C (350°F). Bake the cookies for 12–15 minutes until the edges are slightly golden while the centers remain soft and chewy.
- Cool and Serve: Allow the cookies to cool briefly on the baking sheet, then transfer them to a cooling rack or plate. Enjoy your indulgent Cookie Monster Cookies slightly warm or at room temperature.
Notes
- Using blue gel food coloring ensures a vibrant color without adding too much liquid to the dough.
- Chilling the dough before and after shaping helps the cookies maintain their shape and prevents spreading.
- For extra crunch, you can toast the mini cookies slightly before adding them to the dough.
- Store baked cookies in an airtight container at room temperature for up to 5 days.
- Freezing formed dough balls allows you to bake fresh cookies on demand.
Keywords: Cookie Monster Cookies, Oreo stuffed cookies, blue cookies, chocolate chip cookies, fun cookies, easy dessert