Peppermint Cheesecake Mousse Cups Recipe
Introduction
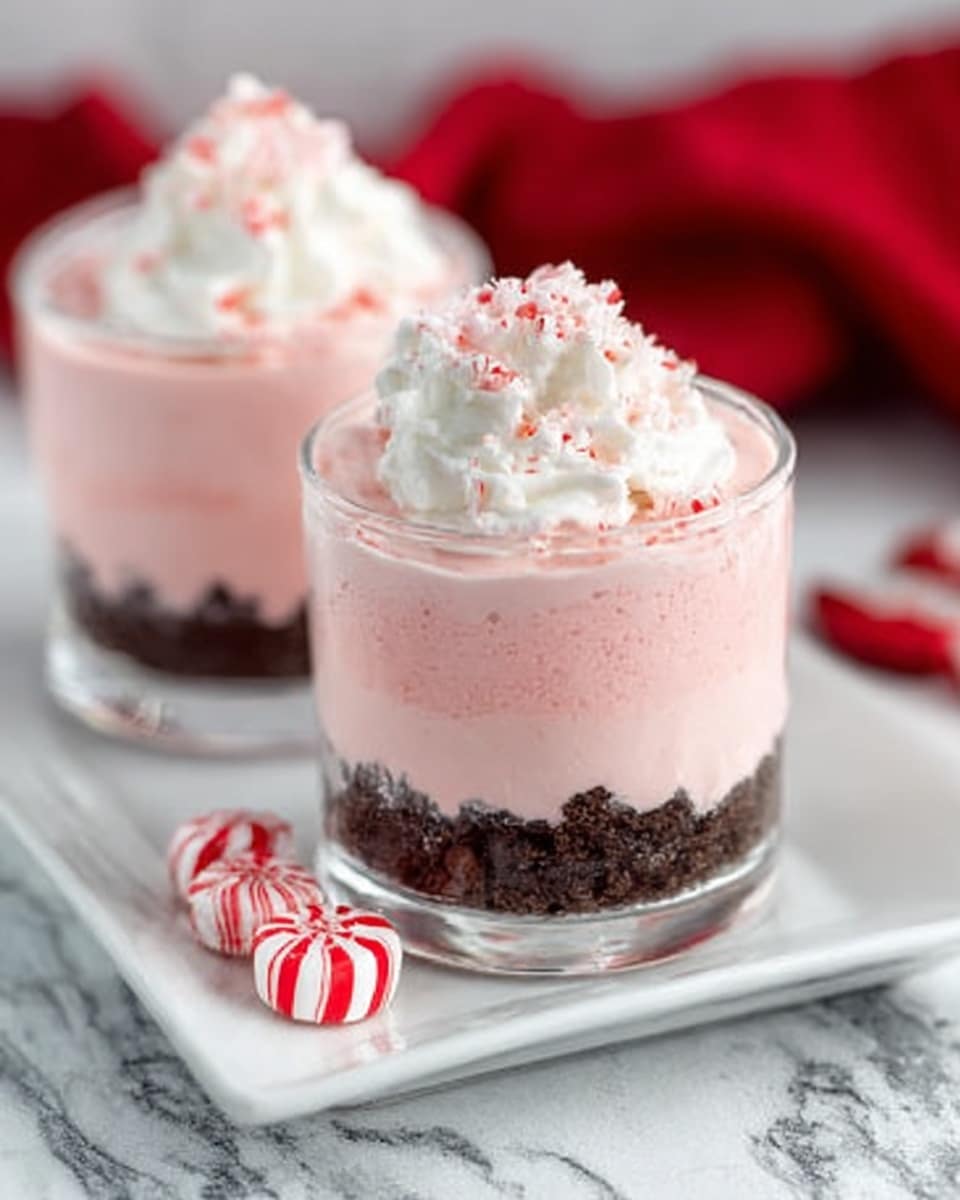
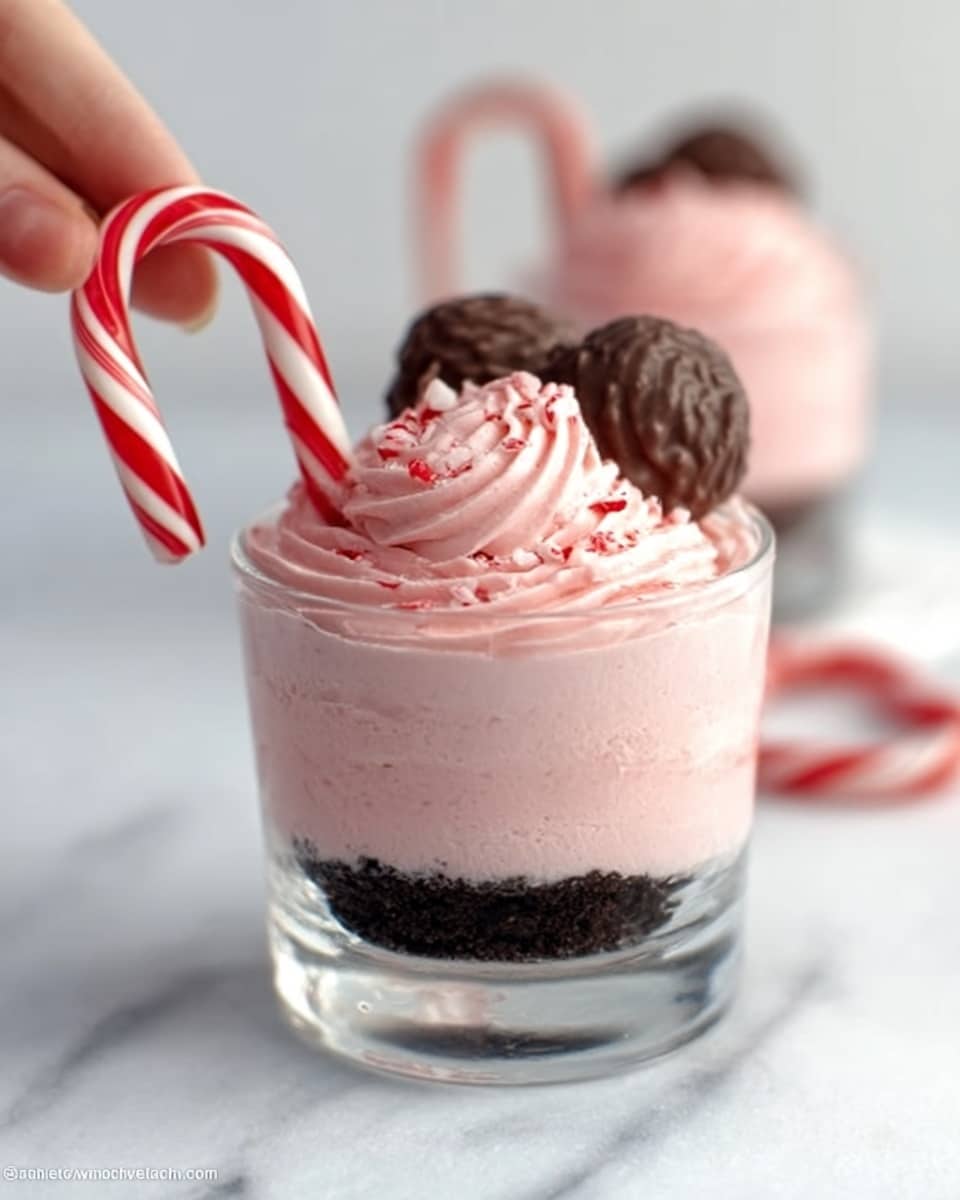
These Peppermint Cheesecake Mousse Cups are a festive and refreshing dessert perfect for the holiday season. Combining rich chocolate crust, creamy peppermint-infused cheesecake mousse, and crunchy candy toppings, they are sure to delight your guests with every bite.
Ingredients
- 1 ½ cups chocolate cookie crumbs (Oreos or chocolate graham crackers)
- 4 tablespoons unsalted butter, melted
- 8 oz (225g) cream cheese, softened
- 1 cup powdered sugar
- 1 teaspoon vanilla extract
- ½ teaspoon peppermint extract
- 1 ½ cups heavy whipping cream, cold
- 4 drops red food coloring (optional)
- Whipped cream (homemade or store-bought, for topping)
- Crushed peppermint candies or mini candy canes (for topping)
Instructions
- Step 1: Combine the chocolate cookie crumbs and melted butter in a mixing bowl. Stir until the mixture resembles wet sand and is evenly coated.
- Step 2: Spoon about 2 tablespoons of the crumb mixture into the bottom of each serving cup. Press gently with the back of a spoon to create a flat crust. Place cups in the refrigerator to chill while preparing the mousse.
- Step 3: In a large mixing bowl, beat the softened cream cheese with an electric mixer until smooth and free of lumps.
- Step 4: Add the powdered sugar, vanilla extract, and peppermint extract to the cream cheese. Mix until fully combined and creamy.
- Step 5: In a separate bowl, whip the cold heavy whipping cream until stiff peaks form. This will take several minutes with a hand or stand mixer.
- Step 6: Gently fold the whipped cream into the cream cheese mixture in two additions, mixing just until combined. If using food coloring, add it now and fold until evenly tinted.
- Step 7: Spoon or pipe the cheesecake mousse over the chilled crust in each cup. Smooth the tops with the back of a spoon or a spatula.
- Step 8: Cover the cups loosely and refrigerate for at least 2 hours or overnight for the best texture.
- Step 9: Just before serving, top each cup with a swirl of whipped cream. Sprinkle crushed peppermint candies over the top and add a mini candy cane to each for garnish.
Tips & Variations
- For a gluten-free option, use gluten-free chocolate cookies for the crust.
- Try adding a drizzle of chocolate sauce over the mousse before adding the whipped cream topping.
- If you prefer a stronger peppermint flavor, increase the peppermint extract slightly, but be careful not to overpower the dessert.
- Use gel food coloring instead of liquid to avoid thinning the mousse texture.
Storage
Store the mousse cups covered in the refrigerator for up to 3 days. For best texture and flavor, consume within this period. When ready to serve, you can add fresh whipped cream and peppermint toppings if stored separately. No reheating is needed, as this dessert is served chilled.
How to Serve
Serve this delicious recipe with your favorite sides.
FAQs
Can I make these mousse cups ahead of time?
Yes, you can prepare the mousse cups a day in advance and keep them refrigerated. This allows the flavors to meld and the mousse to set perfectly.
What can I substitute for peppermint extract?
If peppermint extract is unavailable, you can use a small amount of peppermint oil or crushed peppermint candies stirred gently into the mousse for flavor. Alternatively, replace it with a different extract like vanilla or almond for a different twist.
PrintPeppermint Cheesecake Mousse Cups Recipe
These Peppermint Cheesecake Mousse Cups are a festive and delightful no-bake dessert featuring a rich chocolate cookie crust topped with a creamy peppermint-flavored cheesecake mousse. Finished with whipped cream and crushed peppermint candies, they are perfect for holiday celebrations or any occasion that calls for a refreshing and indulgent treat.
- Prep Time: 20 minutes
- Cook Time: 0 minutes
- Total Time: 2 hours 20 minutes
- Yield: 8 servings 1x
- Category: Dessert
- Method: No-Cook
- Cuisine: American
- Diet: Vegetarian
Ingredients
For the Crust:
- 1 ½ cups chocolate cookie crumbs (Oreos or chocolate graham crackers)
- 4 tablespoons unsalted butter, melted
For the Cheesecake Mousse:
- 8 oz (225g) cream cheese, softened
- 1 cup powdered sugar
- 1 teaspoon vanilla extract
- ½ teaspoon peppermint extract
- 1 ½ cups heavy whipping cream, cold
- 4 drops red food coloring (optional)
For the Topping:
- Whipped cream (homemade or store-bought)
- Crushed peppermint candies or mini candy canes
Instructions
- Prepare the Crust: Combine the chocolate cookie crumbs and melted butter in a mixing bowl. Stir until the mixture resembles wet sand and is evenly coated. This forms the base for your mousse cups.
- Fill the Serving Cups: Spoon about 2 tablespoons of the crumb mixture into the bottom of each serving cup. Press gently with the back of a spoon to create a flat, compact crust. Place the cups in the refrigerator to chill while you prepare the mousse.
- Beat the Cream Cheese: In a large mixing bowl, beat the softened cream cheese with an electric mixer until smooth and free of lumps. This creates a creamy base for the mousse.
- Add Flavorings: Add the powdered sugar, vanilla extract, and peppermint extract to the cream cheese. Mix until fully combined and creamy, infusing the mousse with rich sweetness and peppermint flavor.
- Whip the Cream: In a separate chilled bowl, whip the cold heavy whipping cream using a hand or stand mixer until stiff peaks form. This will typically take several minutes and creates the light, airy texture needed.
- Fold in the Whipped Cream: Gently fold the whipped cream into the cream cheese mixture in two additions, mixing just until combined. If you want a festive touch, add the red food coloring now and gently fold until the mousse is evenly tinted.
- Assemble the Cups: Spoon or pipe the cheesecake mousse over the chilled crust in each cup. Smooth the tops with the back of a spoon or a spatula for an even and attractive finish.
- Chill the Desserts: Cover the cups loosely with plastic wrap or lids and refrigerate for at least 2 hours, or overnight for the best texture and flavor meld.
- Add Toppings: Just before serving, top each cup with a swirl of whipped cream. Sprinkle crushed peppermint candies or mini candy canes over the top to add a festive crunch and decorative touch.
Notes
- For best results, use cold heavy whipping cream to ensure it whips properly.
- You can prepare these cups a day in advance and keep them refrigerated overnight.
- Use chocolate cookie crumbs for a richer flavor, or graham crackers for a lighter crust.
- The red food coloring is optional and adds festive color but does not affect taste.
- To make homemade whipped cream topping, whip heavy cream with a little powdered sugar and vanilla extract until stiff peaks form.
- Feel free to use gluten-free cookie crumbs if you need to make this dessert gluten free.
Keywords: peppermint, cheesecake mousse, no-bake dessert, holiday dessert, peppermint candy, chocolate crust, whipped cream