
Beginner Sourdough Bread Recipe
Introduction
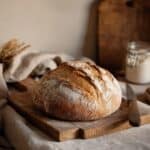
Making sourdough bread at home may seem intimidating, but this beginner-friendly recipe breaks it down step by step. With simple ingredients and clear instructions, you’ll enjoy fresh, tangy sourdough with a crisp crust and soft crumb.

Ingredients
- 2 teaspoons (10 g) sourdough starter
- 3 tablespoons (25 g) all-purpose flour
- 5 teaspoons (25 g) water
- ¼ cup (50 g) active sourdough starter (100% hydration)
- 1 ⅓ cups + 2 tablespoons (350 g) water
- 2 teaspoons (10 g) fine sea salt
- 4 cups + 2 tablespoons (500 g) bread flour
Instructions
- Step 1: Prepare your active sourdough starter about 12 hours before mixing the dough. Combine 2 teaspoons sourdough starter, 3 tablespoons all-purpose flour, and 5 teaspoons water in a clean jar. Stir until mixed, loosely cover, and let it rise at room temperature until doubled in size with bubbles visible.
- Step 2: In a large bowl, mix ¼ cup (50 g) of your active starter with 1 ⅓ cups + 2 tablespoons (350 g) water. Stir to distribute starter evenly.
- Step 3: Add 4 cups + 2 tablespoons (500 g) bread flour and 2 teaspoons (10 g) fine sea salt. Use a spatula or your hands to combine until you form a shaggy dough with no dry flour.
- Step 4: Cover the bowl and rest the dough for 1 hour at room temperature.
- Step 5: Perform a stretch and fold: wet your hand lightly, lift one side of the dough and stretch it over itself, then turn the bowl a quarter turn. Repeat until you complete a full rotation and the dough forms a tight ball.
- Step 6: Cover and rest for 30 minutes. Repeat the stretch and fold once more.
- Step 7: Cover the bowl again and let the dough bulk ferment on your kitchen counter for 7–10 hours. It should rise 50–75% but not double.
- Step 8: Turn the dough onto a lightly floured surface. Shape it by folding the four sides to the center, then flip seam-side down. Gently cup and pull the dough towards you to create a tight skin. Place seam-side down on parchment paper and transfer it to a bowl.
- Step 9: Cover with a tea towel and let the dough rise 1–2 hours at room temperature. Test readiness by pressing a thumb indentation about ½ inch deep; it should spring back slowly.
- Step 10: Preheat your oven with a Dutch oven inside to 450°F (232°C) about 30 minutes before baking. Carefully remove the Dutch oven and lid with heat-resistant gloves.
- Step 11: Score the top of the dough with a sharp knife or razor. Using the parchment paper sling, place the dough inside the Dutch oven, cover with the lid, and bake for 20 minutes.
- Step 12: Remove the lid and continue baking for another 25–30 minutes until the crust is golden brown. The internal temperature should be 205–210°F (96–99°C).
- Step 13: Transfer the bread to a cooling rack and let it cool for 1–2 hours before slicing to allow the crumb to set properly.
Tips & Variations
- Use a digital thermometer to check for doneness to avoid under- or over-baking.
- If your starter isn’t bubbly and doubled, give it more time or feed it again before using.
- Experiment with adding seeds or herbs during the mixing stage for extra flavor.
- For a softer crust, brush the baked loaf lightly with melted butter once cooled.
Storage
Store your sourdough at room temperature wrapped in a kitchen towel, beeswax wrap, or inside a bread bag to keep the crust crisp. Avoid refrigerating, as it can dry out the bread. To freeze, wrap in plastic and place in a freezer-safe container for up to 3 months. Thaw at room temperature, then refresh in the oven if desired.
How to Serve
Serve this delicious recipe with your favorite sides.
FAQs
Can I use all-purpose flour instead of bread flour?
Bread flour has more protein, which helps with gluten development and gives sourdough its chewy texture, but you can use all-purpose flour in a pinch. The loaf may be slightly less chewy and rise differently.
How do I know when the dough is ready to bake?
After the second rise, press your thumb about ½ inch into the dough. If the indentation springs back slowly and not instantly, the dough is ready. Fast spring back means under-proofed, and no spring back means over-proofed.
PrintBeginner Sourdough Bread Recipe
This beginner sourdough bread recipe guides you through making a classic artisan loaf using a homemade active sourdough starter and bread flour. With detailed steps including feeding the starter, mixing, stretch and fold technique, long fermentation, and baking in a Dutch oven, you’ll create a crusty, flavorful loaf with a chewy crumb that’s perfect for sandwiches or enjoying with butter and jam.
- Prep Time: 12 hours (starter preparation) + 30 minutes (dough mixing and resting)
- Cook Time: 50 minutes
- Total Time: Approximately 13 hours (including fermentation and cooling time)
- Yield: 1 medium-sized loaf, about 1 to 1.2 pounds (450–550 g) 1x
- Category: Bread
- Method: Baking
- Cuisine: Artisan/Western
- Diet: Vegetarian
Ingredients
Active Sourdough Starter (¼ cup / 50 g)
- 2 teaspoons (10 g) sourdough starter
- 3 tablespoons (25 g) all-purpose flour
- 5 teaspoons (25 g) water
Dough Ingredients
- ¼ cup (50 g) active sourdough starter (100% hydration)
- 1 ⅓ cups + 2 tablespoons (350 g) water
- 2 teaspoons (10 g) fine sea salt
- 4 cups + 2 tablespoons (500 g) bread flour
Instructions
- Feed your Sourdough Starter: Twelve hours before you plan to make the dough, mix 2 teaspoons of sourdough starter, 3 tablespoons all-purpose flour, and 5 teaspoons water in a clean jar. Stir to combine, loosely cover, and leave at room temperature until it doubles in size and bubbles form, indicating it’s active and ready.
- Mix the Dough: Transfer 50 g of active starter and 350 g water into a large mixing bowl. Stir to distribute the starter evenly. Add 500 g bread flour and 10 g sea salt, then mix with a stiff spatula or your hands until a shaggy dough forms with no dry flour left.
- Rest the Dough: Cover the bowl and allow the dough to rest for 1 hour at room temperature to hydrate and begin gluten development.
- Stretch and Fold #1: Wet your hand to prevent sticking. Reach under the dough, stretch it upward and fold it back over the dough. Turn the bowl 90 degrees and repeat until full circle rotation is complete. The dough should tighten into a ball. Cover and rest for 30 minutes.
- Stretch and Fold #2: Repeat the stretch and fold process one more time. This helps strengthen the dough and build volume in the final loaf.
- Bulk Fermentation: Cover the bowl and leave the dough to rise on your counter for 7 to 10 hours. The dough should increase by about 50-75%, not completely double. Avoid over-proofing, which makes shaping difficult.
- Shape and Second Rise: Turn dough onto a floured surface and pull four sides into the middle to form a tight ball. Flip seam-side down and gently cup and pull the dough towards yourself to create a tight skin. Place dough seam-side down on parchment paper, transfer into a medium bowl, cover with a tea towel, and let rise for 1-2 hours until it passes the indentation test.
- Preheat Oven and Dutch Oven: Thirty minutes before baking, preheat your oven to 450°F (232°C) with the Dutch oven inside to heat up thoroughly.
- Score and Bake: Carefully remove the hot Dutch oven, take off the lid, and score the dough’s top with a razor or sharp knife. Using the parchment paper sling, transfer dough into the Dutch oven, cover with lid, and bake for 20 minutes. Remove lid and bake an additional 25-30 minutes until crust is golden and internal temperature reaches 205-210°F (96-99°C).
- Cool the Bread: Transfer the loaf to a cooling rack for 1-2 hours to finish cooking internally and set the crumb. Avoid slicing too early to prevent a gummy texture.
- Store Properly: Keep bread at room temperature wrapped in a bread bag, kitchen towel, or beeswax wrap. Avoid refrigeration. Freeze full loaves or slices wrapped tightly for up to 3 months.
- Serve: Enjoy warm sourdough with butter, homemade Nutella, or jam for the best flavor experience.
Notes
- The sourdough starter should be bubbly and doubled to ensure good fermentation.
- Stretch and fold techniques develop gluten without kneading.
- Do not over-proof the dough; it should not double during bulk fermentation.
- Use a digital thermometer to check doneness for perfect crumb and crust.
- Cooling is crucial to avoid gummy texture by allowing steam to escape.
- Store bread at room temperature and freeze to maintain freshness.
- Use bread flour for better gluten development and structure.
Keywords: sourdough bread, beginner bread recipe, artisan bread, homemade sourdough, bread baking, Dutch oven bread