Chocolate Pumpkin Patch Dirt Cups Recipe
Introduction
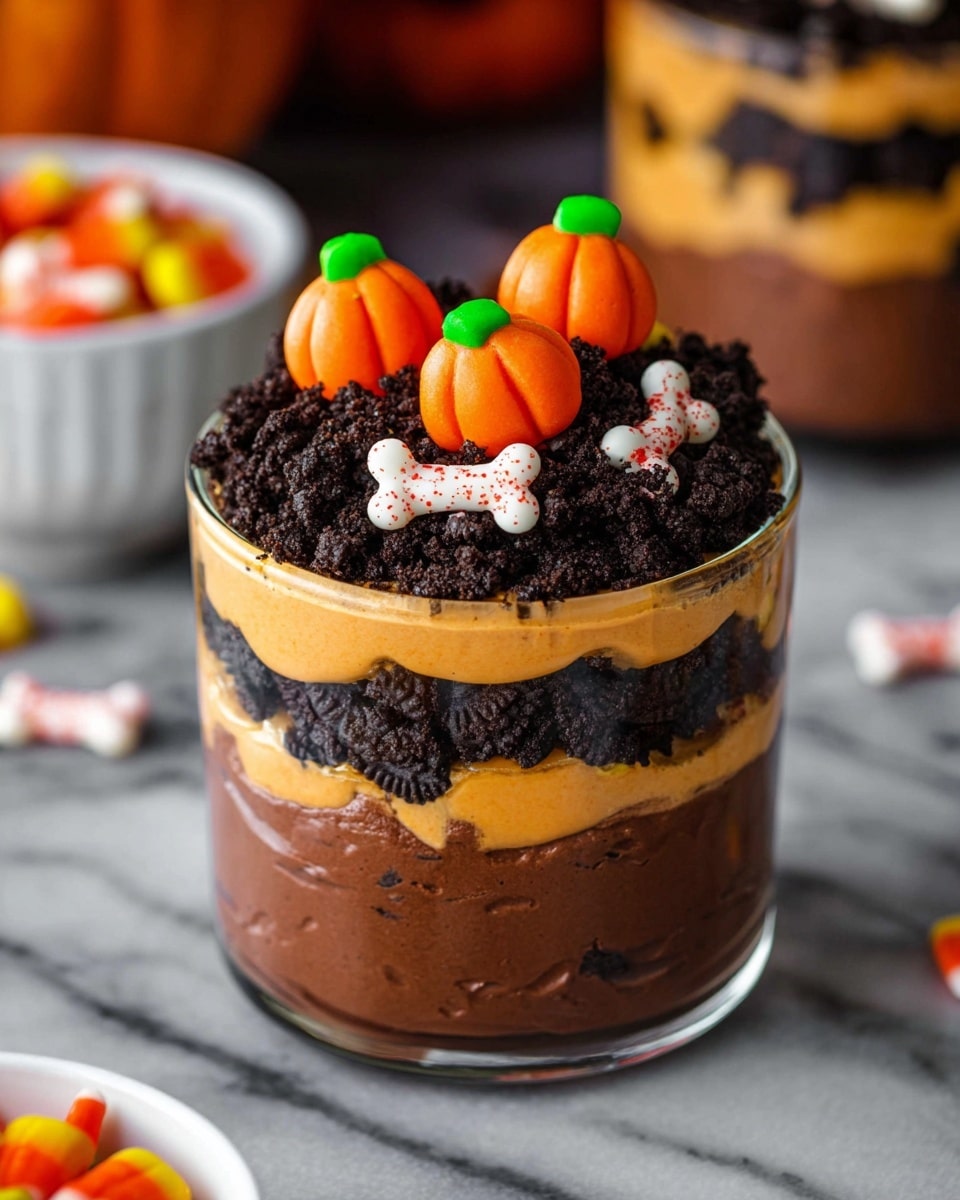
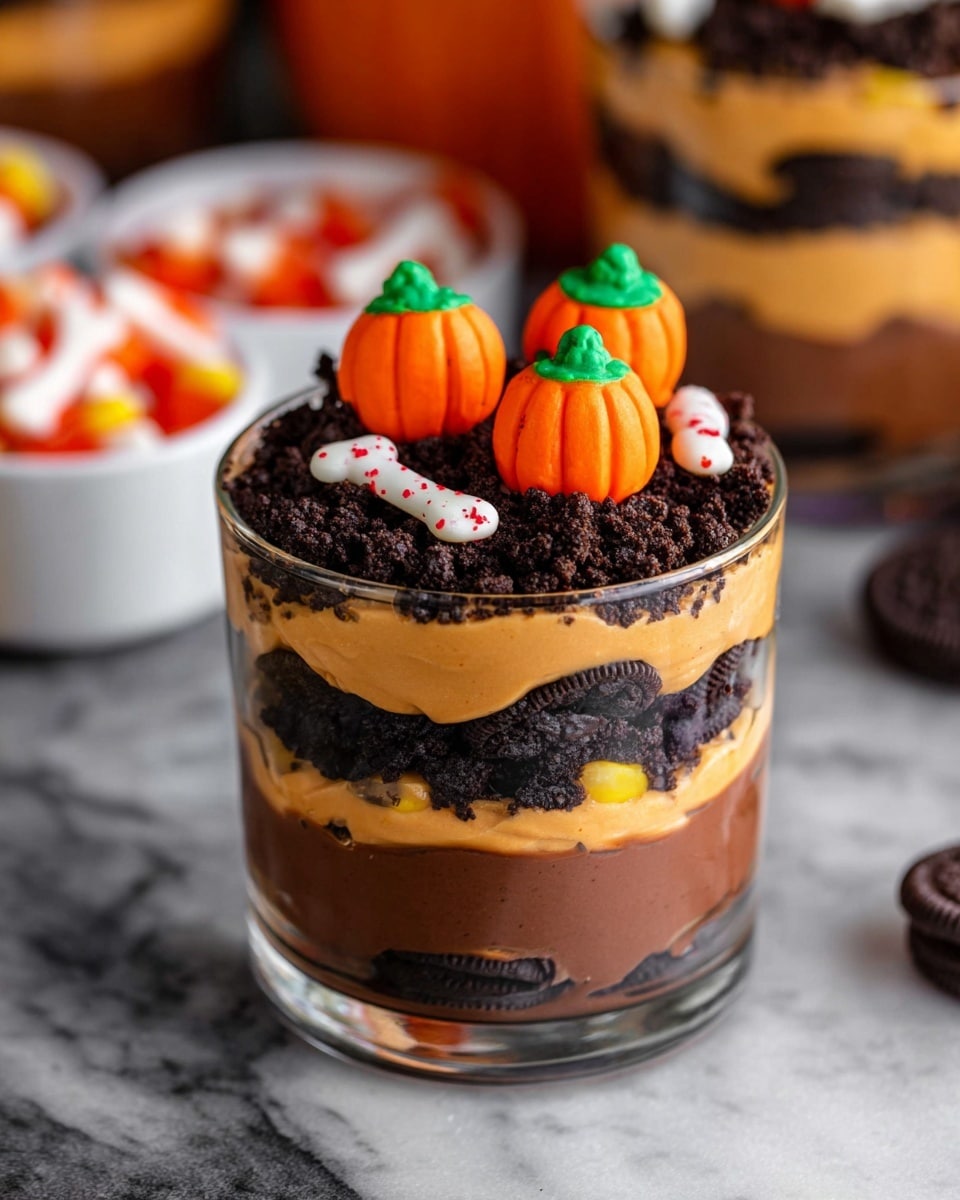
Chocolate Pumpkin Patch Dirt Cups are a fun and festive dessert perfect for fall gatherings and Halloween parties. Layers of creamy chocolate pudding, crunchy cookie “dirt,” and colorful candy pumpkins create a playful treat that’s as delicious as it is adorable.
Ingredients
- 2 cups milk (whole milk for a richer pudding)
- 1 package chocolate sandwich cookies (such as regular Oreos, finely crushed for the “dirt” layer)
- 8 oz whipped topping (like Cool Whip, thawed according to package directions)
- 1 package instant chocolate pudding (3.9 oz, Jell-O recommended)
- Candy pumpkins (for decoration)
- Shredded coconut (or flaked coconut)
- Green food coloring (to tint the coconut for “grass”)
Instructions
- Step 1: Crush the chocolate sandwich cookies. Use a food processor to pulse into fine crumbs or place cookies in a sealed gallon-size ziplock bag and crush with a rolling pin. Set aside for layering.
- Step 2: In a medium bowl, whisk together the instant chocolate pudding mix and milk vigorously for 2 minutes. Let it sit for 5 minutes to thicken.
- Step 3: Gently fold the whipped topping into the thickened pudding until well combined, keeping the mixture light and airy.
- Step 4: Assemble the dirt cups by layering one tablespoon of crushed cookies at the bottom of each cup. Add a layer of the pudding mixture, then alternate layers, finishing with a top layer of cookie crumbs.
- Step 5: Refrigerate the assembled cups for at least 1 hour to let the layers set and flavors meld, making them easier to serve.
- Step 6: To make the green “grass,” place shredded coconut in a container, add a few drops of green food coloring and a small amount of water, then shake until evenly colored.
- Step 7: Just before serving, sprinkle each cup with the green coconut and top with a candy pumpkin for a festive finishing touch.
Tips & Variations
- Use whole milk for creamier pudding or substitute with almond milk for a dairy-free option.
- For extra texture, add mini chocolate chips between pudding layers.
- Use flaked coconut instead of shredded for a different “grass” texture.
- To intensify the pumpkin patch look, add edible candy grass or crushed graham crackers mixed with cinnamon.
Storage
Store leftover dirt cups covered in the refrigerator for up to 3 days. Keep decorations like candy pumpkins separate until serving to prevent sogginess. Reheat is not recommended; serve chilled for best texture and flavor.
How to Serve
Serve this delicious recipe with your favorite sides.
FAQs
Can I make these dirt cups ahead of time?
Yes, you can prepare the dirt cups a day in advance and refrigerate them. Add the coconut “grass” and candy pumpkins just before serving to keep them fresh and vibrant.
What if I don’t have green food coloring?
If you don’t have green food coloring, you can skip tinting the coconut or substitute with fresh chopped mint leaves or green sprinkles to mimic grass.
PrintChocolate Pumpkin Patch Dirt Cups Recipe

Chocolate Pumpkin Patch Dirt Cups are a festive and fun no-bake dessert perfect for Halloween or fall celebrations. Layers of creamy chocolate pudding mixed with whipped topping alternate with crushed chocolate sandwich cookies creating a delicious ‘dirt’ effect. The cups are topped with green-tinted shredded coconut and candy pumpkins to mimic a pumpkin patch, making them visually appealing and delightful to eat.
- Prep Time: 15 minutes
- Cook Time: 0 minutes
- Total Time: 1 hour 15 minutes
- Yield: 8 servings 1x
- Category: Dessert
- Method: No-Cook
- Cuisine: American
- Diet: Vegetarian
Ingredients
For the pudding mixture:
- 2 cups whole milk
- 1 package (3.9 oz) instant chocolate pudding mix
- 8 oz whipped topping (like Cool Whip), thawed
- 1 package regular-size chocolate sandwich cookies (such as Oreos), finely crushed
For the decoration:
- Shredded coconut (about 1/2 cup)
- Green food coloring (a few drops)
- Candy pumpkins (enough to top each cup)
- A splash of water (for tinting the coconut)
Instructions
- Crush the Cookies: Begin by crushing the chocolate sandwich cookies into fine crumbs. You can do this by pulsing them in a food processor or placing them in a sealed ziplock bag and crushing with a rolling pin. Set aside for layering.
- Prepare the Chocolate Pudding: In a medium bowl, whisk together the instant chocolate pudding mix and 2 cups of whole milk vigorously for 2 minutes. Let it set for 5 minutes until thickened.
- Fold In Whipped Topping: Once the pudding has set, gently fold in the 8 oz of thawed whipped topping until well combined, creating a light and airy filling.
- Layer the Dirt Cups: Spoon 1 tablespoon of crushed cookies into the bottom of each serving cup. Add a layer of the pudding and whipped topping mixture, then continue layering alternating between crushed cookies and pudding mixture. Finish with a layer of cookie crumbs on top.
- Chill the Dirt Cups: Place the assembled cups in the refrigerator and chill for at least 1 hour to allow the layers to set and the flavors to meld together.
- Color the Shredded Coconut: In a container with a lid, add shredded coconut, a few drops of green food coloring, and a splash of water. Close the lid and shake until the coconut is evenly tinted green to resemble grass.
- Decorate and Serve: Just before serving, sprinkle each chilled dirt cup with the green tinted coconut and top with a candy pumpkin for a festive pumpkin patch effect. Serve and enjoy this delightful seasonal treat.
Notes
- Use whole milk for a richer, creamier pudding; low-fat milk can be substituted but will yield a lighter texture.
- For extra flavor and more pronounced ‘grass’, add additional colored shredded coconut as garnish.
- Crushing cookies finely is important to achieve the authentic ‘dirt’ texture.
- Chilling the assembled cups helps the layers set, making them easier to serve and eat.
- These cups can be made a day ahead and stored covered in the refrigerator.
Keywords: chocolate pumpkin dirt cups, Halloween dessert, no bake dessert, pumpkin patch pudding, chocolate cookie dirt cups, festive fall dessert