Old-Fashioned Pink Jelly Cakes Recipe
Introduction
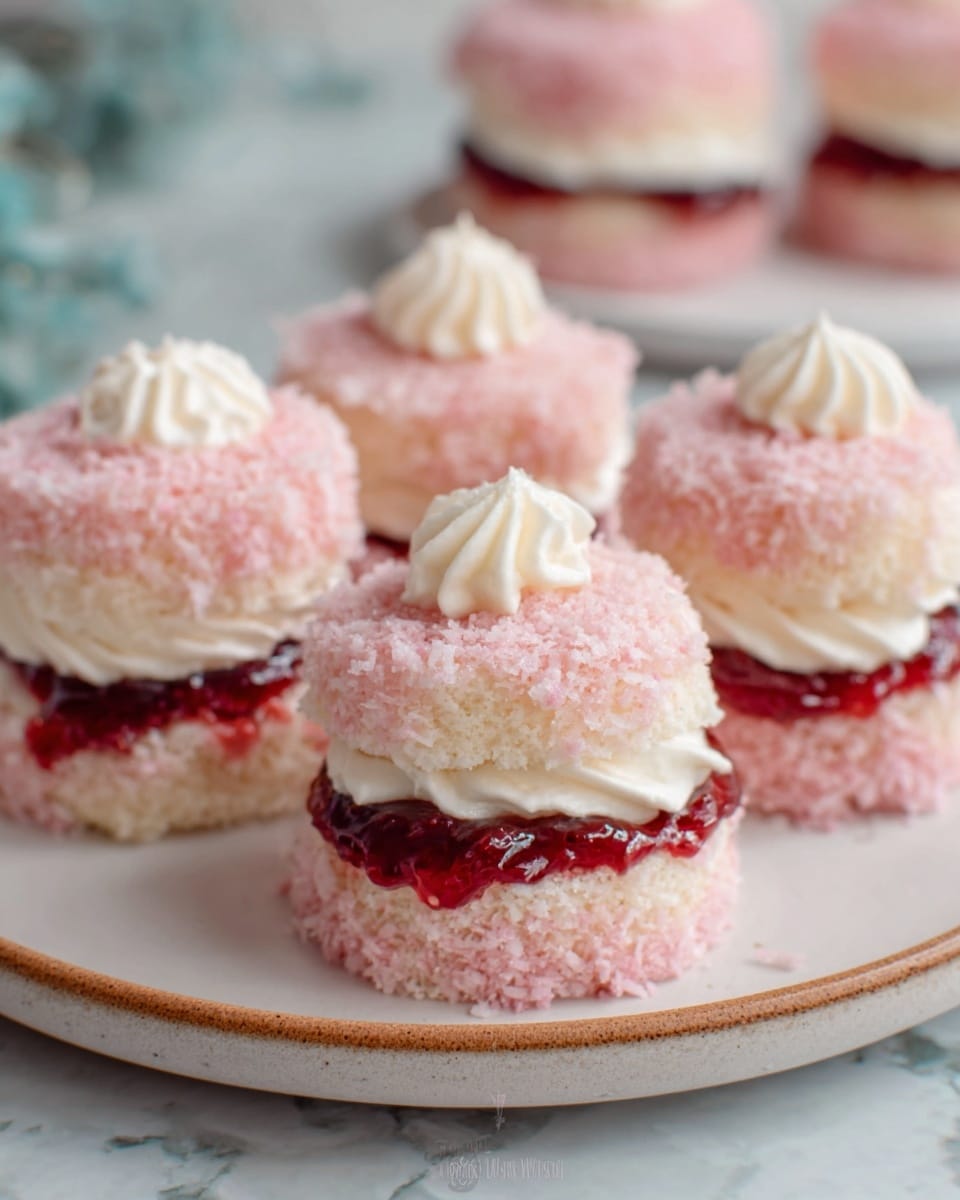
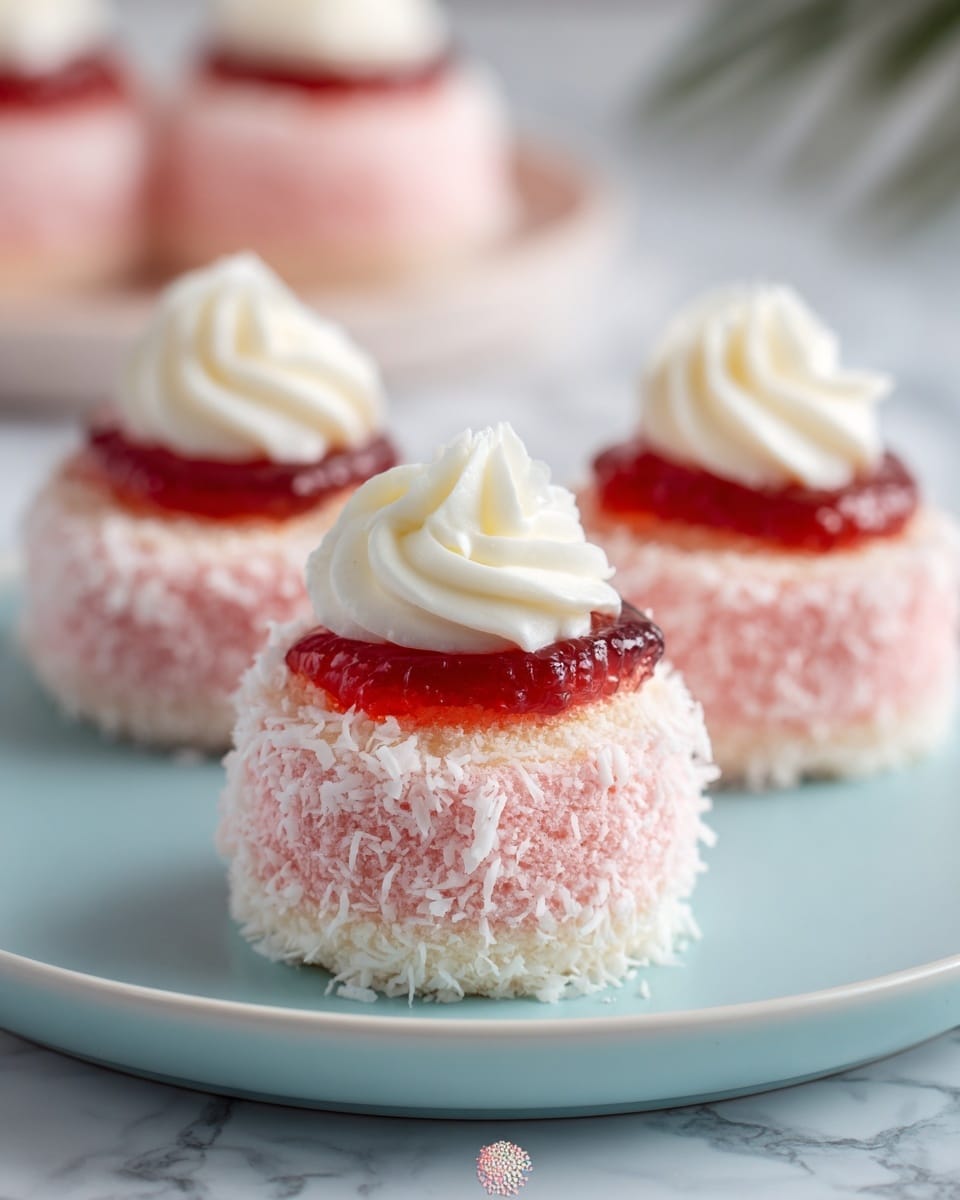
Old-Fashioned Pink Jelly Cakes are a delightful retro treat combining soft sponge, fruity jelly, and creamy filling. These charming little cakes are perfect for afternoon tea or a nostalgic dessert to share with family and friends.
Ingredients
- 80g butter, softened
- 1/2 cup (110g) caster sugar
- 1 tsp vanilla extract
- 1 egg
- 2/3 cup (160g) milk
- 1 cup (130g) self-raising flour, sifted
- 85g packet strawberry jelly crystals
- 1 cup (240g) boiling water
- 1 cup (240g) cold water
- 3 1/2 cups (280g) desiccated coconut
- 1 cup (240g) whipped cream
Instructions
- Step 1: Preheat your oven to 175°C (fan-forced). Lightly grease two 12-hole patty-pan tins to prepare for baking.
- Step 2: In a large bowl, cream together the softened butter, caster sugar, and vanilla extract until the mixture is pale and fluffy. Beat in the egg thoroughly.
- Step 3: Gently fold in the milk and sifted self-raising flour alternately in two batches: add half the milk, then half the flour, and repeat this process.
- Step 4: Spoon the batter evenly into the patty-pan holes, filling each just below the top.
- Step 5: Bake for 15–18 minutes or until the cakes are lightly golden and a skewer inserted into the center comes out clean.
- Step 6: Allow cakes to cool in the tins for 5 minutes, then transfer them to a wire rack to cool completely.
- Step 7: Prepare the strawberry jelly by dissolving the crystals in boiling water, then stir in the cold water. Place in the refrigerator and chill until the jelly is partially set, about 1–2 hours.
- Step 8: Using a slotted spoon, dip each cooled cake into the partially set jelly, then roll it in desiccated coconut to coat thoroughly.
- Step 9: Spread whipped cream over one half of a cake, then sandwich it together with another jelly-coated cake.
- Step 10: Chill the assembled jelly cakes in the fridge for 30 minutes to allow the jelly to set firmly before serving.
Tips & Variations
- For a different flavor, try using raspberry or lime jelly crystals instead of strawberry.
- Ensure the jelly is only partially set when dipping the cakes, so it coats well without melting the sponge.
- Fresh whipped cream is best, but you can substitute with stabilized cream to help the cakes hold longer.
- If you prefer a firmer cake, add an extra 1-2 minutes to baking time, but be careful not to overbake.
Storage
Store the assembled jelly cakes in an airtight container in the refrigerator. They will keep well for up to 2 days. Reheat is not recommended as the jelly and cream components don’t hold up to warming. Serve chilled for the best texture and flavor.
How to Serve
Serve this delicious recipe with your favorite sides.
FAQs
Can I make these jelly cakes gluten-free?
Yes, substitute the self-raising flour with a gluten-free baking flour blend. Ensure it contains a raising agent or add baking powder to mimic the texture.
What can I use instead of desiccated coconut?
If you don’t like coconut, crushed freeze-dried strawberries or finely chopped nuts can provide a different texture and appearance, though it will change the traditional flavor.
PrintOld-Fashioned Pink Jelly Cakes Recipe

These classic Old-Fashioned Pink Jelly Cakes are a delightful nostalgic treat featuring soft self-raising flour cakes dipped in strawberry jelly and rolled in coconut, then filled with whipped cream. Perfect for afternoon tea or a charming dessert, they combine light fluffy sponge with fruity gelatin and creamy filling, offering a beautiful pink and white contrast that’s as tasty as it is visually appealing.
- Prep Time: 20 minutes
- Cook Time: 18 minutes
- Total Time: 3 hours 8 minutes
- Yield: 24 cakes (12 sandwiches) 1x
- Category: Dessert
- Method: Baking
- Cuisine: Australian
Ingredients
Cake Batter
- 80g butter, softened
- 1/2 cup (110g) caster sugar
- 1 tsp vanilla extract
- 1 egg
- 2/3 cup (160g) milk
- 1 cup (130g) self-raising flour, sifted
Jelly and Coating
- 85g packet strawberry jelly crystals
- 1 cup (240g) boiling water
- 1 cup (240g) cold water
- 3 1/2 cups (280g) desiccated coconut
Filling
- 1 cup (240g) whipped cream
Instructions
- Preheat Oven and Prepare Tins: Preheat your oven to 175°C (fan-forced) and lightly grease two 12-hole patty-pan tins to prevent sticking.
- Cream Butter, Sugar, and Vanilla: In a large mixing bowl, use an electric mixer to cream the softened butter, caster sugar, and vanilla extract until the mixture is pale and fluffy. This creates a light texture for the cake batter.
- Incorporate Egg: Beat in the egg thoroughly until it is fully incorporated into the creamed mixture, ensuring a smooth batter.
- Fold in Milk and Flour: Alternately fold half of the milk and half of the sifted self-raising flour into the batter gently using a spatula to maintain airiness. Repeat with the remaining milk and flour until just combined.
- Fill Patty-pan Holes: Spoon the cake batter evenly into the prepared patty-pan holes, filling each just below the top edge to allow for rising.
- Bake the Cakes: Bake in the preheated oven for 15 to 18 minutes or until the cakes are lightly golden and a skewer inserted in the center comes out clean. This ensures they are fully cooked but still soft.
- Cool the Cakes: Allow the cakes to cool in the tins for 5 minutes to firm up slightly, then transfer them to a wire rack to cool completely, which will prevent sogginess.
- Prepare Strawberry Jelly: Dissolve the strawberry jelly crystals in the boiling water, stirring thoroughly. Then add the cold water and refrigerate the jelly mixture until it is partially set, about 1 to 2 hours, achieving a thick but slatherable texture.
- Dip Cakes in Jelly and Roll in Coconut: Using a slotted spoon, dip each cooled cake into the partially set jelly so it is coated evenly. Immediately roll the jelly-coated cake in desiccated coconut until fully covered for a delightful texture and flavor contrast.
- Assemble the Cakes: Spoon whipped cream onto one half of a coated cake, then sandwich it with another cake to create a jelly cream sandwich.
- Chill to Set: Place the assembled cake sandwiches in the fridge and chill for 30 minutes to allow the jelly to fully set, resulting in a cohesive and delicious treat.
Notes
- Ensure the jelly is only partially set before dipping cakes to get the proper coating consistency.
- Use room temperature butter and eggs for better mixing and cake texture.
- Store cakes in the refrigerator after assembling to keep the whipped cream fresh and jelly firm.
- The cakes can be made a day ahead and chilled until serving for best flavor development.
- If desiccated coconut is not preferred, finely shredded coconut can be used as an alternative coating.
Keywords: pink jelly cakes, old-fashioned dessert, strawberry jelly cake, coconut cakes, cream-filled cakes, Australian desserts, afternoon tea treats