Witch Hat Cookies Recipe

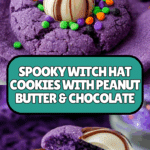
Witch Hat Cookies are festive Halloween treats featuring a soft peanut butter cookie base tinted purple, rolled in colorful sprinkles, and topped with a chocolate kiss to resemble witch hats. These charming cookies combine a tender, flavored dough with crunchy sugar coating and melty chocolate for a delightful seasonal snack.
- Prep Time: 15 minutes
- Cook Time: 10 minutes
- Total Time: 2 hours 25 minutes (including chilling time)
- Yield: 33 cookies 1x
- Category: Dessert, Cookie
- Method: Baking
- Cuisine: American
- Diet: Vegetarian
Ingredients
Scale
Dry Ingredients
- 1 ½ cups all-purpose flour
- 2 teaspoons cornstarch
- ½ teaspoon baking soda
- ¼ teaspoon baking powder
- ⅛ teaspoon fine sea salt
Wet Ingredients
- ½ cup unsalted butter, softened
- 1 cup granulated sugar
- 1 large egg
- ¾ cup creamy peanut butter
- 1 teaspoon vanilla extract
- purple gel food coloring, to desired color
Coating and Topping
- Halloween sprinkles or purple sanding sugar
- 33 chocolate kisses (or Hugs candies), unwrapped
Instructions
- Prep Dry Ingredients: Line a sheet tray with parchment paper. In a large bowl, stir together flour, cornstarch, baking soda, baking powder, and salt until evenly combined. Set aside.
- Cream Butter and Sugar: Using an electric hand mixer or stand mixer fitted with paddle attachment, beat the softened butter and sugar together on medium speed for about 2 minutes until light and fluffy.
- Add Egg and Flavorings: Add the egg to the creamed mixture and mix until combined. Then add creamy peanut butter and vanilla extract, mixing thoroughly. Scrape down the bowl sides as needed to ensure even mixing.
- Combine Wet and Dry: Add the dry ingredient mixture to the wet ingredients bowl and stir until just combined. Add purple gel food coloring a little at a time until you achieve the desired purple hue, stirring well to distribute color evenly.
- Chill the Dough: Using a 1 tablespoon cookie scoop or by eye, portion scoops of dough onto the prepared sheet tray, spacing them close but not touching. Cover the tray tightly with plastic wrap and refrigerate for at least 2 hours, preferably overnight, to firm up the dough.
- Preheat Oven: Preheat the oven to 350°F (175°C). Line one or more sheet trays with parchment paper and set aside.
- Coat Cookies in Sprinkles: Place Halloween sprinkles or sanding sugar into a small bowl. Remove chilled dough from the refrigerator. Roll each dough scoop into a smooth ball, then roll the ball in the sprinkles or sanding sugar to coat completely. Arrange coated cookie dough balls about 2 inches apart on the prepared sheet trays.
- Bake: Bake the cookies in the preheated oven for 9 to 11 minutes, or until the cookies are puffed and beginning to crack on top but not browned.
- Cool and Assemble: Let the cookies cool on the sheet tray for about 5 minutes to set. Then immediately press a chocolate kiss candy into the center of each cookie, gently pushing down so it sticks.
- Set the Chocolate: Place the tray of cookies with kisses into the freezer for 10 minutes to prevent the chocolate from melting.
- Final Cooling: After freezing, transfer the cookies to a wire rack to cool completely before serving or storing.
Notes
- Chilling the dough overnight enhances flavor and helps cookies hold their shape during baking.
- Use purple gel food coloring sparingly to avoid affecting dough texture.
- Freezing the assembled cookies prevents the chocolate kisses from melting and maintains the witch hat shape.
- Store cookies in an airtight container at room temperature for up to 5 days.
- For a nut-free version, substitute peanut butter with sunflower seed butter.
Keywords: Halloween cookies, witch hat cookies, peanut butter cookies, festive treats, holiday baking, chocolate kisses cookies
Find it online: https://dinewithdylan.com/witch-hat-cookies-recipe/